In this is article, we cover how to use custom fields to extend the capabilities of your model.
Users in Pilario have the ability to create custom fields to enhance the model's functionality based on their specific requirements.
Please note that the definition of custom fields is only available on Professional and Enterprise licence. Read more in our Pricing page.
Users can define the custom fields in their settings page. There, they will be able to see all their custom fields and create new ones. While creating new ones they will need to provide several attributes as explained below.
Under the general section, a user can define the following attributes
- Type: can be extend or overwrite. Extend is used to create new fields either to compute information or to display additional information. Overwrite is used to overwrite another input field
- Model: to define the LCA model where the custom field apply. For organizations that have only one model, this field will be automatically filled with the single available model.
- Sections: to define in which section (or model subproduct) the custom field will be applied. Several sections can be selected.
- Field: the desired name of the custom field. If of type extend (see type) any name can be given, if of type overwrite the user must select the name of the field that wants to be overwritten in the drop down.
- Status: to activate or deactivate the custom field.
Under the settings section, a user can define the following attributes:
- Type: the type of custom field i.e Boolean, Date, Integer, Real, String. Depending on this type, other attributes might be available for definition i.e minimum or maximum value for numbers.
- Read only: if enabled the custom field will be presented greyed out and the user will not be able to modify the field. To be used with computed fields.
- Default value: the desired default value for the custom field which will be presented while filling the values.
- Possible values: a set of predefined values presented to the users in a drop down.
- Category: the category where the custom field will appear, if nothing is specified the custom field will be added to a Miscellaneous category.
- Level: the level where the custom field should appear.
- Row index: the position (row) in which the custom field will be placed in the table of input values.
- Column index: the position (column) in which the custom field will be placed in the table of input values.
- Required: to define rules that might make the custom field mandatory before the user can save the form.
- Visibility: to define rules that might make the custom field visible or hidden in the form.
Example
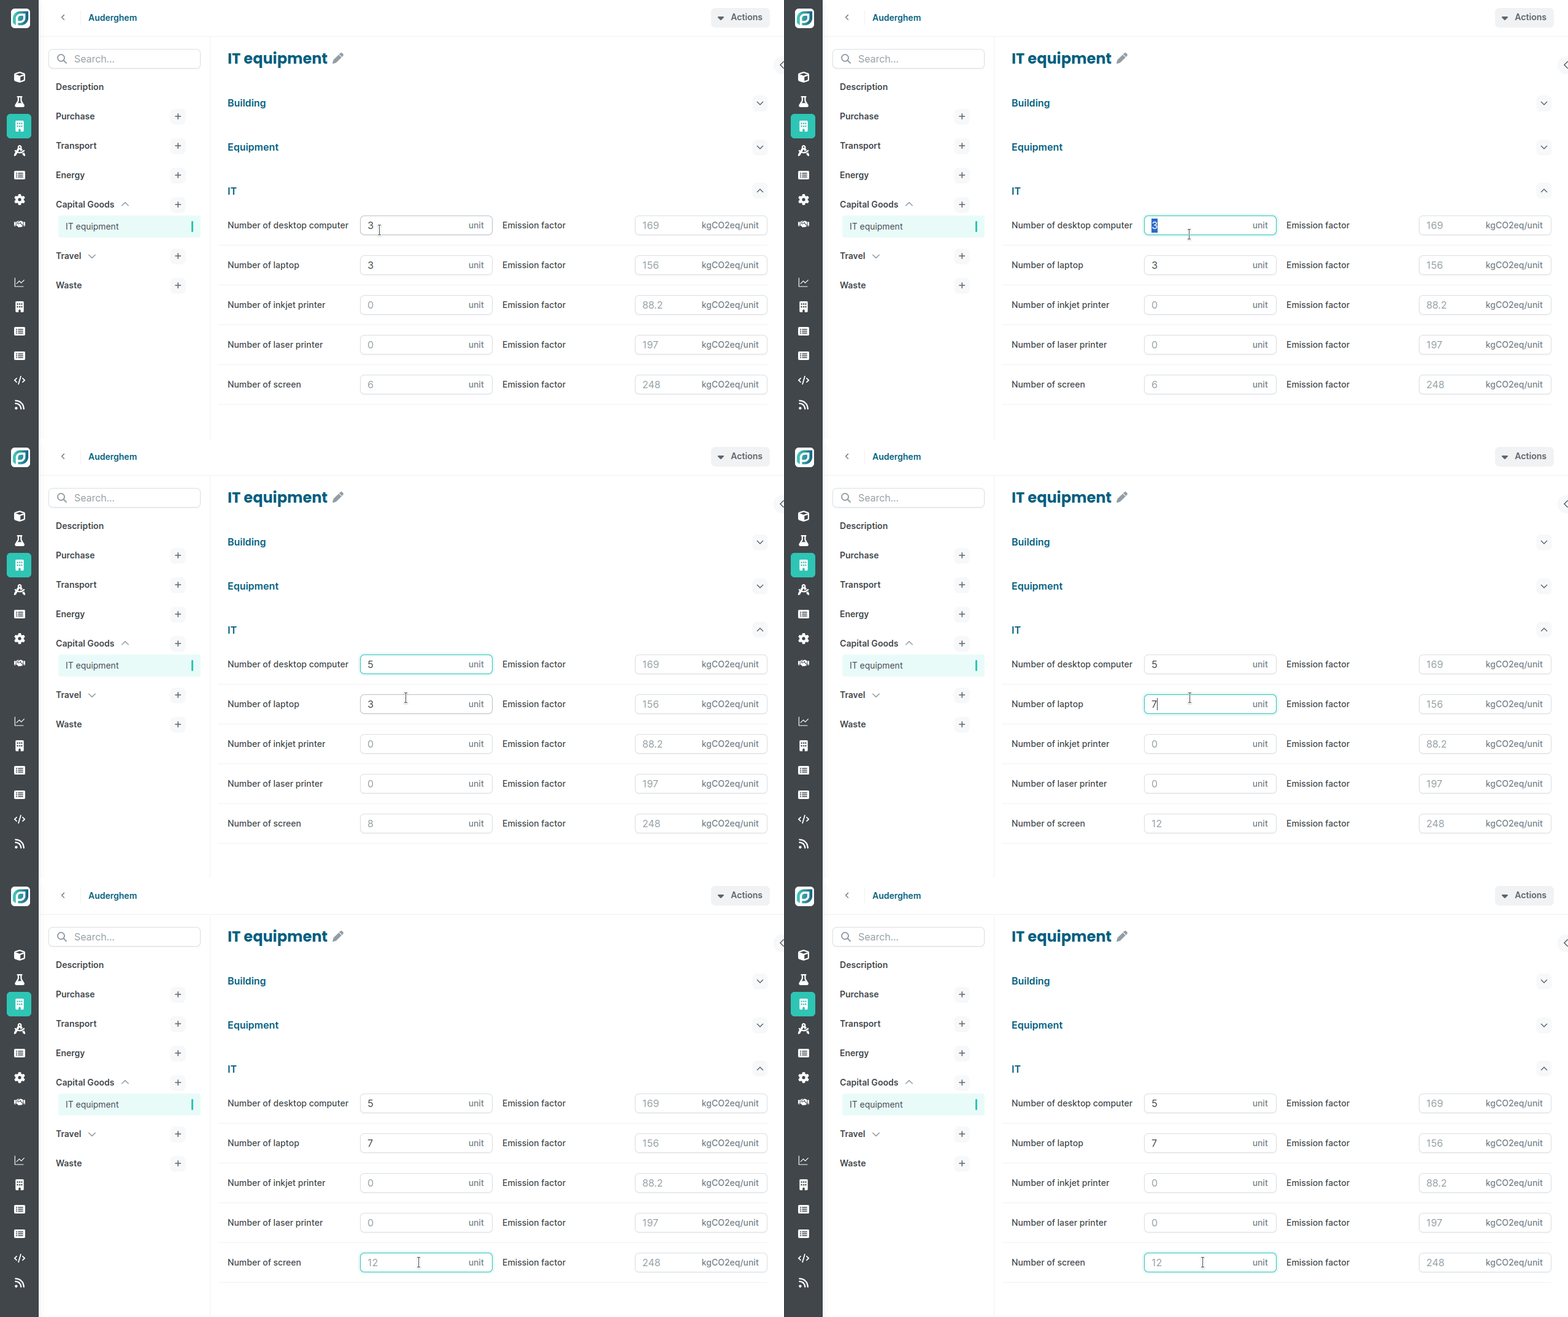
Let's see how we could extend the functionality of our Carbon Footprint model to simplify the input of data to our users. In this example, we will show you how to create a custom field which overwrites the input field (Number of screen) based on two others (number of desktop computer and number of laptop).
In the Carbon Footprint model, we have several sections, presented in the left menu. We will focus on the Capital Goods, where we can define assets via the ➕ button. Create a new level, and call it IT equipment. You should get something this.

Note that we have an IT subsection, where we have the input fields Number of desktop computer, Number of laptop and Number of screen.
In our example, we are going to assume that we want Number of screen to be the sum of the two others, and we will create a custom field for that instead of having the user filling that value.
In the left menu go to Settings > Data > Custom fields.
Click on the upper right button, Add custom field, and fill with the following information under the General section.
- Type: Overwrite
- Model: Carbon Footprint
- Sections: Select CF_CapGoods_BI
- Field: select Number of screen
- Status: select Active
Fill with the following information under the Settings section.
- Type: select Integer
- Read only: don't check the box
- Computed field: check the box
- Formula: select Custom
- Value: insert the following formula into the text box.
const {  subAsset, getFieldValue } = context
const laptops = Number(getFieldValue(subAsset,'cf_cg_it_computer_laptop_data'))
const desktops = Number(getFieldValue(subAsset,'cf_cg_it_computer_desktop_data'))

const screens = laptops+desktops
return(screens.toFixed(0))
- Category: IT
- Level: Capital goods
That's it! We have finished our configuration of the custom field. Now, our users will get that field filled automatically.

Unleash the power of Pilario by defining many more custom fields according to your needs.
